Sunday, February 2, 2020

H.G. Wells' "The War of the Worlds" (1898), Star Begotten (1936)

Edward Gorey, 1960
H. G. Wells' novel The War of the Worlds was initially serialized in Britain in Pearson's Magazine from April to December of 1897 and illustrated by Warwick Goble (it was simultaneously published  in the US in Cosmopolitan magazine). The following year it was published in book form by the Heineman publishing house. A notable 1906 French translation was illustrated by Henrique Alvim Corréa and published by Vandamme & Co. Edward Gorey was commissioned to illustrate a limited edition in 1960.

In Brief: When a strange metallic object crashes in a Woking field southwest of London, the narrator (Wells) and many locals converge on the spot to investigate. The object turns out to be a vessel from Mars, and the Martians begin using a heat ray to incinerate everything around their landing site. Wells has relatives escort his wife to relative safety, but he remains behind to witness the army engaging the Martian machines with artillery. Meanwhile, Wells' brother in London helps some women escape the approach of the Martian tripods. They escape to France, but behind them the British are apparently losing the battle, victim to a toxic black smoke. Outside London, Wells and another desperate survivor hide from the Martians in an abandoned house. They realize that the Martians are eating humans and creating even more machines for their invasion (as well as employing a "red weed" to consume the landscape). Wells eventually makes his way to London and discovers that the Martians are all dying from Earth bacteria, as they had not evolved an immunity to these foreign viruses. After returning home, he eventually reunites with his family.

Synopsis
Warwick Goble, 1897
Book One: The Coming Of The Martians

1. The Eve Of The War: Much older than Earth and running out of resources, the Martians begin firing massive cannons to propel their spaceships to Earth in order to colonize it. Using a telescope, Wells and his friend Ogilvie can only see mysterious puffs of smoke on the surface of Mars. The Martian launches continue for 10 nights.

2. The Falling Star: A falling star is sighted, and Ogilvie locates it near the Woking sand pits (southwest of London). He sees the end of a cylinder briefly unscrewing itself and alerts the newspapers. The public begins to converge.

3. On Horsell Common: Wells visits the cylinder and helps the scientists establish a perimeter. He realizes the object is from Mars, but doubts any living creatures are within it.
4. The Cylinder Opens: The cylinder begins unscrewing again and a shopkeeper falls into the pit. A tentacled Martian emerges and everyone flees in terror. The shopkeeper tries to climb out of the pit but disappears.

Warwick Goble, 1897
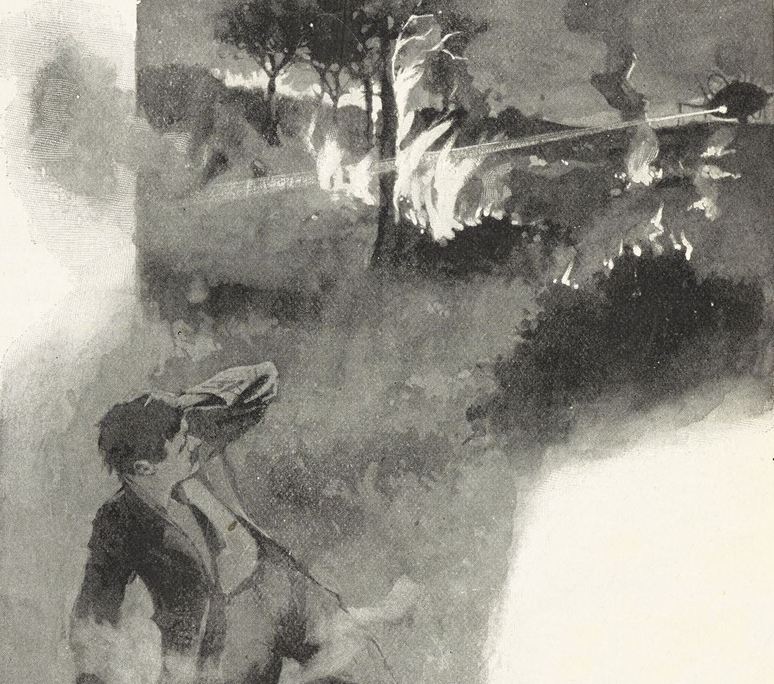
5. The Heat-Ray: The crowd begins to edge forward again in curiosity. Three men approach with a white flag. A heat beam kills the men and sets fire to some of the crowd and the surrounding field. Wells flees in shock.

6. The Heat-Ray In The Chobham Road: The outer edge of the heat ray destroys the nearby surrounding street and causes a mass flight.

7. How I Reached Home: As Wells gets farther and farther away from the carnage, he finds an increasingly indifferent crowd. When he gets home (to Maybury) he tells his wife what has happened, but believes they are safe since the Martians appear to be stuck in the pit.

8. Friday Night: In general, no one takes the news of the invasion seriously. Hammering sounds are heard near the pit. Troops begin massing around the cylinder. Another cylinder falls to Earth.

Warwick Goble, 1897
9. The Fighting Begins: Wells learns that the soldiers plan on trying to capture the Martians. They evacuate the nearby houses. Shelling begins on the 2nd crashed cylinder. Later, the destructive range of the heat ray begins reaching Wells' own neighborhood and he and his wife flee down the opposite side of Maybury Hill towards Old Woking and past Send.

10. In The Storm: Wells leaves his wife with relatives at Leatherhead. Wells returns to Maybury through Ockham. He sights two Martian tripods and, stunned, crashes his cart into a stream. During a hailstorm he eventually finds his way back to his own house.

11. At The Window: Wells sees a landscape of destruction from his study window. A fleeing artilleryman arrives and describes how the tripods have obliterated the army forces. The tripods continue laboring on something in the pit area.

12. What I Saw Of The Destruction Of Weybridge And Shepperton: Wells and the artilleryman make it to Weybridge, which is being evacuated by the army. The tripods arrive and cross the river. Wells dives underwater to evade their heat ray. An artillery shell gets lucky and destroys one of the tripods. The other two tripods lash out and Wells narrowly escapes. The tripods bring the wreckage of the damaged tripod back to their base at Horsell Common.

13. How I Fell In With The Curate: Wells paddles down a river amidst the destruction. He runs into a babbling curate, who is close to losing his mind. They decide to continue northward.

14. In London: Wells describes the exploits and feelings of his brother in London during the past few days. Despite rumors of a Martian invasion, the feeling of danger only slowly mounts, until one morning news of the Martians' toxic "black gas" arrives, triggering the beginnings of a mass evacuation.

15. What Had Happened In Surrey: As the tripods begin to advance towards London, another artillery burst damages one of them. The tripods convene, and soon begin firing toxic gas pellets (leaving a "black smoke") into any place where artillery might be hiding. For any visible guns they use the heat ray.

16. The Exodus From London: As London evacuates, rioting begins. Wells' brother manages to flee on a bicycle. He runs into and aids two ladies and they fight against a fleeing mob of panicked people.

17. The Thunder Child: As Wells' brother and his friends flee on a ship to France, Martian tripods attack. The ironclad Thunder Child engages the tripods and destroys two of them, although the heat rays destroy the ironclad.

Warwick Goble, 1897
Book Two: The Earth Under The Martians

1. Under Foot: Wells and the curate find food and shelter in a house. Unfortunately, a Martian cylinder crashes nearby and traps them in the house.

2. What We Saw From The Ruined House: Wells describes the appearance of the Martians. The Martians build various devices to enable them to build more complex equipment.

3. The Days Of Imprisonment: Wells and the curate begin getting on each others' nerves. Wells witnesses the consumption of a man by the hooting Martians.

Warwick Goble, 1897
4. The Death Of The Curate: The curate goes insane and draws the attention of the Martians. Wells hides and the curate is taken.

5. The Stillness: As Wells hides in the house, red weed (parasitic growth brought by the Martian vehicles) begins to cover over the only peephole. A dog appears, and as Wells emerges from his hiding place, he realizes that the Martians have moved on. Outside, he sees a neighborhood choked with red weed.

6. The Work Of Fifteen Days: Wells describes the damage done to the neighborhood, as well as the phenomenon of the red weeds.

7. The Man On Putney Hill: Wells runs into the artilleryman he had met earlier. The soldier explains his plans of fighting back against the Martians. Wells spends some time with the soldier, helping him dig a tunnel, but then realizes that he is wasting his time and must return to London.

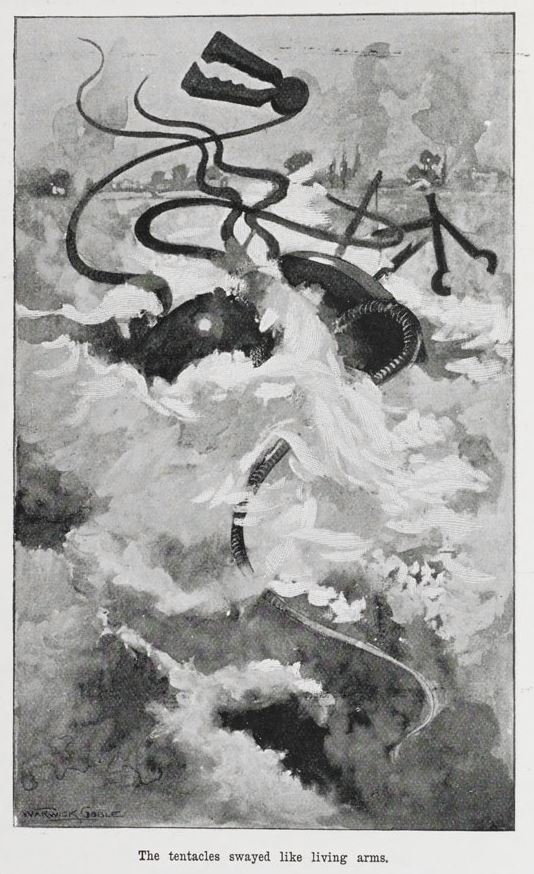
8. Dead London: Reaching London, Wells hears a strange wailing sound. He finds motionless Martian machines in various states of decrepitude. Reaching the Martians' central pit, he sees that they have all died from Earth-based bacteria, just as they were about to finish building a flying machine.
Warwick Goble, 1897
9. Wreckage: Wells finds other survivors and eventually makes his way back to his own home. There, he finds it empty, but he is relieved when his wife and cousin suddenly arrive.

10. Epilogue: Humanity recovers and proposes various theories concerning future invasions from Mars. Observers suggest that Mars has instead set its sights on Venus.

Henrique Alvim Corréa, 1906

Amazing Stories, Aug 1927, Frank R. Paul
Amazing Stories, Sept 1927, Frank R. Paul


Wikipedia Entry


Star Begotten

Wells' 1937 novel Star Begotten has a tangential connection to The War of the Worlds, as it mentions Martians and even cites the in-universe publication of The War of the Worlds in its narrative. Star Begotten is essentially a satire describing how a flippant theory about a Martian plan to mutate humanity into Martians (by way of cosmic ray bombardment) becomes a brief fad in the public consciousness. Ultimately, the fad dies down and some even wonder if this new "superman" may actually be a welcome development for mankind.

  1. The Mind Of Mr. Joseph Davis Is Greatly Troubled: A historical fiction writer becomes concerned about his inability to understand his wife’s “fey” ways. Perhaps more importantly,  they are expecting their first child.
  2. Mr. Joseph Davis Learns About Cosmic Rays: At a gentleman’s club, Davis hears one of the members give a lecture on science and the nature of cosmic rays, which are constantly bombarding the Earth. One of the more imaginative members of the club proposes that some of the cosmic rays hitting the Earth may actually be a part of a Martian plot to mutate humanity into Martians.
  3. Mr. Joseph Davis Wrestles With An Incredible Idea: Taken with the idea of the Martian eugenics plot, Davis begins to ask his wife’s gynecologist Dr. Stedding about this possibility.
  4. Dr. Holdman Stedding Is Infected With The Idea:  Initially skeptical, Stedding soon begins to consider the idea as a possibility (although reluctantly).
  5. Professor Ernest Keppel Takes Up The Idea In His Own Peculiar Fashion: One of Stedding’s colleagues, an embittered scientist named Keppel also begins to be infected with the idea. They theorize on how Martians might appear (Keppel is also familiar with Olaf Stapledon's novel Last and First Men).
  6. Opening Phases Of The Great Eugenic Research: Davis begins to research hospitals and schools, trying to determine if "inferior" examples of children have begun to surface in society.Soon, Davis' son is born, but there seems to be nothing odd about the baby. Davis begins to inquire about "superior" forms of children appearing.
  7. The World Begins To Hear About The Martians: A newspaperman get a hold of the Martian theory and tries to start a social movement. However, most people seem rather indifferent about the whole affair after awhile.
  8. How These Star-Begotten People May Presently Get Together: Davis and his friends theorize that these “star-begotten” Martian mutants may eventually begin to recognize each each “in the wild” and eventually take over the Earth.
  9. Professor Keppel Is Inspired To Foretell The End Of Humanity: Keppel believes that eventually mankind will be replaced by the new form of Earth-born Martian. He also wonders if this will lead to a kind of utopia.
  10. Mr. Joseph Davis Tears Up A Manuscript: Upset about the seeming inevitability of the Martian takeover, Davis destroys the manuscript to his latest book. When he tells his wife of his theories, she proposes that Davis himself may already be a Martian mutation. With this realization in mind, Davis finds peace at last.


Saturday, February 1, 2020

H. Rider Haggard: "King Solomon's Mines" (1885), "She" (1886), and "Benita" (1906)


King Solomon's Mines (1885)

Published in 1885, H. Rider Haggard's early novel King Solomon's Mines is technically not "fantastic literature", but it's an important part of modern science fiction and fantasy history because it launched the "lost world" sub-genre in the popular consciousness. In contrast to journeys to the moon, this form of adventure took its heroes to unexplored areas of Earth, where they discovered various lost cultures which had been cut off from the modern world. This allowed the protagonists to essentially have "first contact" experiences with all kinds of exotic societies. This concept would further evolve when Sir Arthur Conan Doyle's 1912 novel The Lost World introduced dinosaurs to the modern era, and then again when A. Merritt's stories "The People of the Pit" (1918) and "The Moon Pool" (1919) introduced super-powered alien entities thriving in hidden enclaves.

Cassell & Company 1886 / Map leading to King Solomon's Mines (Cassell and Company 1907)

Theo Stroefer's Kunstverlag c. 1900, Art: Édouard Riou
In any case, the narrative of King Solomon's Mines contains the first appearance of Haggard's hero Allan Quatermain, who would go on to have an entire series of books and stories devoted to his adventures (18 in total, not including his notable appearance in the Alan Moore/Kevin O'Neil comic series The League of Extraordinary Gentlemen). In KSM, Allan helps an aristocrat named Sir Henry Curtis search for his missing brother, who had last been seen in Africa in search of King Solomon's secret diamond mine (referred to in ancient biblical texts).

After a long, arduous journey across the desert, Quatermain's party cross a mountain range and discover Kukuanaland, an unmapped territory populated by an isolated society of African warriors. However, before they find either Sir Henry's brother (or any diamonds), Quatermain and his friends become embroiled in a civil war. Eventually, his party is led by a strange, seemingly centuries-old witch woman towards an ominous pit, and soon face their greatest challenge deep in the Earth.

Aside form the "lost world" premise, Quatermain himself is an interesting character. Playing against expectations, he is not much of a fighter, and freely admits to cowardice in the face of overwhelming odds. However, he does have a very sharp mind, and manages to get through several scrapes with his clever tongue and sense of tactics. In contrast, Sir Henry (described as having Danish blood in his veins) plays the "undefeatable warrior" here, and the romantic aspect of the story focuses on Sir Henry's compatriot, the naval officer Captain Good (and his "love at first sight" romance with the native girl Foulata).

J. Hetzel & Cie 1888, Art: Édouard Riou
Detailed Synopsis (illustrations below by Walter Paget from the 1887 Cassell edition):

  • Introduction: The text presents itself as the "true testimony" of Allan Quatermain concerning his recent adventures in Africa. He expresses his regret in not including more information on some of the more technical aspects of the discoveries he has made, and hopes that the truth of his tale will carry the reader forward.
  1. I Meet Sir Henry Curtis: While aboard a ship bound for Natal (South Africa), hunter-trader Allan Quatermain is befriended by a Danish-looking English aristocrat named Sir Henry Curtis and an ex-Royal Navy officer named Captain Good. Sir Henry is seeking information about his missing brother George Neville, whom Quatermain had run into recently.
  2. The Legend of Solomon's Mines: Quatermain tells the two men about an incident many years ago in which he had run into a Portuguese adventurer who had claimed to have discovered the biblical Solomon's treasure, located in the mountains beyond the desert. The Portuguese had also given Quatermain a map to the treasure on his deathbed (passed down through generations). More recently, Quatermain had passed these directions on to Neville, who was apparently seeking Solomon's lost diamonds. In the end, Sir Henry asks Quatermain to help him find his brother at the mythic mountains of Solomon.
  3. Umbopa Enters Our Service: After arriving at Quatermain's home in Durban, Quatermain helps Sir Henry prepare for the dangerous journey ahead. Shortly before they depart, a Zulu "outcast" named Umbopa volunteers his services, as he wishes to return to his ancestral lands in the north (where the party are heading).
  4. An Elephant Hunt: Several months later, the party encounter a herd of elephants while heading north. The white men decide to spend the day hunting. Nine elephants are killed, but one of their Zulu servants is torn into pieces during the battle. 
  5. Our March Into the Desert: Just before crossing the southern border of the desert, Umbopa hints that he may know more about the journey ahead than expected. In any case, the party begin their northward trek across the desert, traveling during the night and seeking shelter during the day. Their water begins to run low.  
  6. Water! Water!: By following the Portuguese's map, the party find a small oasis marked as "bad water". Eventually they reach "Sheba's Breasts", two snow-capped mountains bordered by a cliff wall on each side. As they ascend the left "breast", the temperature drops, and when faced with a snow-covered expanse they seek shelter in a cave.
  7. Solomon's Road: There, they discover the frozen corpse of the original map-maker, an ancestor of the Portuguese adventurer. Heading down the other side of the Sheba's left breast, they soon reach a much warmer region which is covered in forestry. They continue north on a man-made road ("Solomon’s Great Road"), apparently built during Egyptian times. Eventually, they come across some aborigines, who try to kill the "forbidden visitors". After Quatermain convinces them that they are "star gods", the natives ("Kukuanas") decide to take the men to their king in the capital city of Loo.
  8. We Enter Kukuanaland: The leader of the Kukuana party, Infadoos, explains that their people have armies to defend against periodic invasions from the north, and also because of a recent civil war in which the ageless witch woman Gagool had installed a false king in a coup. That night, they sleep in a Kukuana military camp.
  9. Twala the King: Soon they reach Loo, a massive compound guarded by eight thousand Kukuana warriors. During an audience with their gigantic and grotesque King Twala, a shrunken witch-doctress (Gagool) accuses the white men of seeking jewels and gold. She also suspects Umbopa of being more than he at first seems. Although Twala is suspicious of the travelers, he promises that no harm will come to them - yet.
  10. The Witch-Hunt: Back in their hut, Umbopa reveals that he is Ignosi, the rightful king of Kukuana, exiled many years ago as a child by Twala after the coup. Infadoo promises to try and rally supporters to Umbopa's side. First however, the travelers are forced to witness a Kukuana ritual in which Gagool's "witches" point out "sinners" amongst the warrior crowd and mark them for immediate executed.
    After over a hundred Kukuana are slain, Gagool points to Umbopa. When the "star gods" object with their "death tubes" (rifles), Twala allows Umbopa to live.
  11. We Give A Sign: That night, Infadoos brings several Kukuana generals to Ignosi in the hopes of gaining their support for a rebellion. In order to convince them of the "star gods'" power, Captain Good promises that they can eliminate the moon from the heavens. The next night, another ceremony occurs in which a girl named Foulata is chosen to be sacrificed. As darkness falls, Quatermain warns Twala of his power over the heavens. In short order, the moon begins to darken from a lunar eclipse (predicted by Good's almanac). When Twala's son tries to kill Sir Henry, the burly, armored Englishman retaliates and kills the boy instead. While Twala and his retainers flee, Infadoo leads the resistance party to an encampment outside the capitol under cover of the moonless night.
  12. Before the Battle: At the resistance encampment, Infadoos gathers twenty thousand warriors and makes preparations for Twala's inevitable attack. Unfortunately, Twala's force outnumbers Ignosi's force two to one. In a couple days, Twala's forces approach in three divisions, designed to attack the camp from three sides.
  13. The Attack: In the first attack, Ignosi's forces manage to hold their position and repel Twala's initial force. However, more forces arrive to join Twala's army, and the water begins to run out in the encampment zone. Quatermain urges Ignosi to strike Twala first before it is too late. They formulate a plan in which Sir Henry leads Infadoos' elite Grey Warriors in a frontal attack at a narrow pass to distract from hidden flanking attacks lead by Good and another Kukuana chieftain. In a second frontal line, Ignosi (with Quatermain) will try to break through and target Twala.
  14. The Last Stand of the Greys: That night, the battle begins. At the pass, the frontal force of Greys is whittled down until Sir Henry, Infadoos and the remaining Greys are surrounded by Twala's forces. Ignosi and Quatermain then rush in to attack, but even this force is eventually surrounded. Fortunately, the flanking forces (including one led by Good) then arrive and Twala's surprised army is driven into a retreat. After reasembling his victorious warriors, Ignosi's army marches into Loo and confronts Twala in his pavilion. There, Twala challenges Sir Henry to a final duel, but  after a bloody fight, Sir Henry cuts Twala's head off with Twala's own axe.
  15. Good Falls Sick: In the ensuing days, Good becomes ill from an infected wound in his leg, but Foulata nurses him back to health. After Ignosi consolidates his rule, he orders Gagool to show the white men the way to the secret treasure cave in the north. Although initially resistant, Gagool eventually relents - however she also hints that the place is cursed.
  16. The Place of Death: Three days later, Gagool leads the adventurers north until they reach three small mountains. In between the mountains, they find a gigantic mining pit, and beyond the pit giant statues of three pagan gods (two male and one female). Behind the "Silent Ones", a tunnel leads to a cathedral-like cave of stalactites. Eventually, Gagool shows them the "Place of Death", a room containing a long table with a horrifying, gigantic skeleton at its head holding a threatening spear (the "White Death"). Seated around the table are the petrified remains of the previous kings of Kukuana. On the table they see Twala's corpse (with his head in his lap), being slowly transformed into stone by dripping stalactites.
  17. Solomon's Treasure Chamber: In a hidden recess, Gagool triggers a switch which causes a massive stone door to rise up into an upper recess. Behind the door the party finally reach Solomon's treasure chamber. However, while the Englishmen marvel at the diamonds and gold, Gagool rushes towards the exit and triggers the lowering of the stone door with the intention of trapping the men inside. Foulata tries to stop her but is mortally wounded and soon dies. However, Gagool is too slow to escape the door's descent and is crushed underneath the massive stone. Unfortunately, the men soon realize that they are trapped in the chamber.
  18. We Abandon Hope: After a day spent in despair, Good discovers a stone ring in the floor. This eventually opens up to an underground passageway. After a long period of wandering, the three men emerge at the bottom of the mine. They climb out of the mine and reunite with Infadoos' party. Quatermain also emerges with a few diamonds still in his pockets.
  19. Ignosi's Farewell: After recovering from their ordeal, the three Englishmen inform Ignosi that they are going home. Although sorry to see them leave, Ignosi warns them that no white men (treasure seekers, missionaries, etc.) will be allowed into Kukuanaland from that point forward. He also gives them some guides which show them a much easier route back to civilization than the way by which they had arrived.
  20. Found: When the party reach an oasis, they discover Sir Henry's lost brother George, who has been marooned there for two years due to a crippled leg. After emerging from another long journey through the desert, Quatermain returns to Durban, while Sir Henry, his brother and Good return to London to sell the diamonds.

Wiki Entry

King Solomon's Mines at Standard Ebooks 

Illustrations at VisualHaggard.org


The Reader's Library 1920, Art: Albert Morrow


SHE: A History of Adventure (1887)

Written by Haggard after the success of King Solomon's Mines, She was first serialised in the British magazine "The Graphic" magazine from October 1886 to January 1887. Later in 1887, it was published as a novel but with some revisions to tone down the violence. It's original appearance featured illustrations by E. K. Johnson. The 1888 edition featured illustrations by Maurice Greiffenhagen and C. H. M. Kerr. A final Haggard edition was published in 1896.

In Brief: Professor Holly and his ward Leo receive an artifact which leads them to believe that one of Leo's ancient ancestors had been executed by an immortal white African sorceress. They mount an expedition into Africa and eventually come across the Amahaggar, who serve "She" (apparently the immortal sorceress). Although nearly sacrificed in a cannibal ritual, Holly and Leo are eventually escorted to the secret land of Kôr, where "She" resides. The immortal reveals herself to be named Ayesha and claims that she is 2000 years old. She is haunted by being the cause of her lover Kallikrates' death. However, when she sees Leo, she believes that Leo is Kallikrates reincarnated. Ayesha takes them to a volcanic chamber where the Fire of Life resides, which she claims originally gave her immortality. When Leo is hesitant to enter the flames, Ayesha volunteers to re-enter the Flame to prove its safety. However, a second exposure to the Flame causes her to shrivel and die. Professor Holly and Leo escape the secret chamber as a landslide covers the entrance forever.

Detailed Synopsis
Introduction: The narrator describes a chance meeting with Cambridge Professor Holly and his associate Mr. Vincey. Years later, he receives a written testimonial from Holly. Holly asks that the author publish the following account, while he and Vincey's son Leo go on a final adventure.

1: My Visitor: The narrator (Professor Holly) is visited by Vincey, who is in an disturbed state of mind. Vincey gives Holly charge of his son Leo, as well as a locked box to be opened on Leo's 25th birthday. The next morning, Vincey is found dead.

2: The Years Roll By: Over the following years, Holly raises Vincey's son Leo into an exceedingly handsome young man. A servant named Job is hired to help care for the boy.

3: The Shard of Amenartas: On Leo's 25th birthday, they open Vincey's locked box. Inside, a letter from Vincey describes a strange ancestral secret deep in the jungle. Engraved on a piece of pottery is a message from an Egyptian princess (Amenartas, apparently an ancestor of Vincey's) to her son Kallikrates. The princess describes a mysterious, immortal white woman deep in the jungle, who had murdered her husband for rejecting her advances. Leo declares that they will go in quest of this white African sorceress.

4: The Squall: The travelers try to relax on their ship when a storm hits. The adventurers make it to their whaling ship and barely make it to calmer waters.

5: The Head of the Ethiopian: The travelers sight a giant head-shaped sculpture (also described in Vincey's letter) and a stone wharf, and proceed into the swamplands.
E. K. Johnson
6: An Early Christian Ceremony: After a harrowing journey up the river, the troupe encounter the Amahaggar people ("People of the Rocks"), who decide to bring them to "She who must be obeyed". One of the Amahaggar women (Ustane) kisses Leo and he kisses her back, which Ustane mistakes as part of a bonding ritual.

7: Ustane Sings: The travellers wait with the Amahaggar in a large encampment while their leader Billali departs for further instructions from She. Holly learns more about the customs of the Amahaggar. One night, Ustane sings a song of love to Leo, but breaks off when the song seems to hint at a dark fate for their love.

8: The Feast, and After!: At a feast, the Amahaggar try to kill Mahomed, the travellers' Arab servant. When Holly shoots Mahomed's captor (and Mahomed by accident), the tribesmen attempt to kill the remaining travellers. After a great battle they are overcome by numbers, but are suddenly spared from death by a command to "cease".

9: A Little Foot: Saved by the return of Billali, the antagonistic tribesmen are sentenced to death. Billali shows Holly a perfectly preserved foot from the sepulchre, impressing Holly with its highly preserved state.

10: Speculations: Billali leads the party on a journey to Kôr, city of She. Billali's litter falls into the swamp but Holly saves Billali's life.

11: The Plain of Kôr: The party are escorted through a secret passage cut into a mountain side and emerge in the city of Kôr, located in the crater of a mountain.

12: She: The visitors are clothed and fed in a cave complex, but Leo is still very ill from the earlier attack. Billali escorts Holly alone to see She, who teases Holly for his false bravado. He reprimands Billali for the earlier attack the visitors had suffered.
Maurice Greiffenhagen
13: Ayesha Unveils: She reveals herself as Ayesha, and professes to be over two thousand years old. When Holly sees her unveiled, he is stunned and entranced by her beauty, but also senses evil and sadness within her. Ayesha becomes excited when she sees a scarab ring which the party had retained from Leo's father's cache.

14: A Soul In Hell: Holly begins to suspect that Leo is the lover Ayesha has been waiting for all these centuries. Following a secret passageway, he spies Ayesha cursing an unknown woman (Amenartes) before the corpse of ancient Kallikrates.

15: Ayesha Gives Judgment: The warriors who had earlier attacked Holly and his friends are sentenced to torture in a hearing ceremony. Ayesha explains to Holly that this must be done in order to enforce control in the city.

16: The Tombs of Kôr: Ayesha gives Holly a tour of the tombs of Kôr, where the citizens of the lost civilization are perfectly preserved at the moment of their deaths. The inscriptions describe the downfall of Kôr through plague.

17: The Balance Turns: Holly returns to Leo and finds that he is nearing death. After preparing an elixir, Ayesha arrives and recoils when she recognizes Leo as her lost love Kallikrates. After a tense moment, the medicine works and Holly and Ayesha relax.

18: Go, Woman!: Ayesha is angered when she realizes that Ustane loves Leo. She uses her power to drive Ustane away. When Leo awakes, Ayesha pretends to be a humble handmaiden and tries to comfort him.

19: "GIVE ME A BLACK GOAT!": The travellers are witness to an Amahaggar nighttime dance/pantomime, lit by burning mummies. In one dance, a woman drinks the blood of a sacrificial goat. Holly and Leo are secretly approached by Ustane, but Ayesha suddenly appears.

20: Triumph: Ayesha brings them all to her inner chamber. After Ustane professes her love to Leo, Ayesha kills her with a gesture, and uses her powers to mesmerize the outraged Leo. She leads them down to her resting chambers to show them proof that Leo is Kallikrates.

21: The Dead and Living Meet: Ayesha shows them the preserved body of the Kallikrates she had killed in jealousy two thousand years past, and then destroys it, now that Leo has returned as the "new" Kallikrates. Holly and Leo return to their chambers, with no hope of escape.

22: Job Has a Presentiment: Job describes a dream where his dead father tells him that they will be together soon. Ayesha tells Holly and Leo of her plans to make Leo immortal and then to conquer the outside world.

23: The Temple of Truth: Ayesha takes Holly and Leo on a trip to the ruins of the city of Kôr.
24: Walking the Plank: In the morning, Ayesha describes bad dreams. The party moves on, and eventually begin climbing the lip of a volcano crater. Ayesha and her guests are forced to cross a great chasm by walking across a flimsy plank.

25: The Spirit of Life: Reaching a hidden chamber, Ayesha decribes the deceased Noot, a protector of the magical fire of life. She explains that in the ancient days, she had brought Kallikrates and Amenartas to the same spot, and, after she had received her powers, killed Kallikates in jealousy. Eventually they continue deeper into the bowels of the volcano and come to a cavern which contains a flashing pillar of fire: the magic fire of life.

26: What We Saw: When Leo is hesitant about the safety of bathing in the magic fire, Ayesha offers to bathe in it first herself to show its beneficial effects. Unfortunately after she emerges from the flame she undergoes rapid aging and dies. Job also dies from shock.
Maurice Greiffenhagen
27: We Leap: Leo and Holly barely make it out of the volcano, accidentally causing a rockslide which buries the path to the magic flame of Life. They reunite with Billali outside.
E. K. Johnson
28: Over the Mountain: With Billali's aid, Holly and Leo manage to make their way out of the swamp and eventually back to England.
Michael Whelan

Benita, An African Romance (The Spirit of Bambatse) (1906)

Longmans, Green and Co. 1906

19 years after SHE, Haggard introduced a new female protagonist in Benita, An African Romance (also known as The Spirit of Bambatse). This adventure features a heroine named Benita who is drawn into a quest for hidden gold located somewhere in the remote fortress of Bambatse, a fictional city located in deep Africa populated by natives of probably Egyptian descent. Accompanied by her ailing father and his unscrupulous partner Jacob Meyer, Benita also becomes caught in between a tribal war between the peace-loving scholars of Bambatse and the aggressive Matabele, a neighboring warrior tribe bent on conquest. Aside from the adventure aspects of the story, elements of the supernatural appear when Benita begins to commune with the spirits haunting the fortress. Unfortunately, an unwanted psychic link also develops between Benita and the predatory Meyer, who slowly goes mad during the course of the story.

Newcastle Publishing Co., 1979
Synopsis  
(Illustrations by Gordon Browne)

  1. Confidences: On board the Zanzibar, a ship bound for Africa, a woman named Benita Beatrix Clifford meets an English sharpshooter named Robert Seymour. Benita tells Seymour that she will be meeting her distant father in Africa after a long separation. Seymour mentions that he had once met her father near a haunted fortress named Bambatse while searching for a lost Portuguese treasure.
  2. The End of the Zanzibar: Impulsively, Seymour professes his love for Benita and asks her to marry him, but before she can answer the Zanzibar hits a rock, causing it to start sinking. When Benita is knocked unconscious, Robert carries her aboard a lifeboat.
  3. How Robert Came Ashore: When the lifeboat spots a woman and her baby adrift on the sea, Robert gives up his own spot on the boat so that they can be rescued. After dropping overboard, Seymour eventually makes it to shore after an arduous swim and falls unconscious. Meanwhile, the lifeboat carrying Benita is eventually picked up by a steamer named the Castle.
  4. Mr. Clifford: When the Castle arrives at Durban (Southeast Africa), Benita is reunited with her relieved father, Mr. Clifford. However, when she learns of Seymour's apparent death, she tearfully admits that she would have happily agreed to his marriage proposal. In any case, she joins her father on a trip towards his horse farm at Rooi Krantz.
  5. Jacob Meyer: On the way to the farm, Clifford and Benita become separated from their wagons and become lost in the veldt. However, they are eventually found by Clifford's partner, an ambitious German Jew named Jacob Meyer, who Benita instantly takes a disliking to. Strangely, Meyer claims that he had responded to thoughts "sent" to him by Benita.
  6. The Gold Coin: Several weeks pass without word of Seymour and Benita loses hope that he might have survived the shipwreck. One night, Clifford and Meyer tell Benita that they are planning to search for a cache of lost Portuguese gold hidden at Bambatse. Hundreds of years ago, native Zulus had cornered a Portuguese party there. After the Portuguese had all starved to death, the last survivor, a female, had then thrown herself into the river below the fortress, declaring that no one would ever find the gold until her return. Clifford gives his daughter a gold coin, a souvenir left behind by the Portuguese and proof of the stories truthfulness.
  7. The Messengers: Native messengers from Bambatse arrive and claim that Benita looks like the ghost of the Portuguese woman. They also tell Clifford and Meyer that their leader needs guns, and in return they will be permitted to search for gold at the Bambatse fortress. Benita joins their party and they soon set out with the guns.
  8. Bambatse: Several months later the party arrive at Bambatse and meet the Molimo, the leader of the Makalanga (the natives living at the fortress). The Molimo tells them that he has had a vision from the White Lady promising that her descendant will soon visit. However, he also fears an attack from an aggressive tribe to the north, the Matabele.
  9. The Oath of Maduna: Three Matabele warriors arrive and deliver an ultimatum to the Makalanga, and threaten their three guests. When the Matabele leader threatens Benita, Meyer spontaneously shoots him. When Meyer threatens to shoot the other two, Benita asks that they be spared and released. Before departing, one of them, Maduna, promises that he owes her a life debt.
  10. The Mountain Top: After preparations are made for a defense against a Matabele attack, the Molimo brings Clifford, Meyer and Benita to the central structure of the fortress. There they find a granite cone, apparently used for ritual purposes. The Molimo then asks that Benita alone accompany him to a cave he calls the "place of death".
  11. The Sleepers In the Cave: Inside the cave, Benita sees the skeletons of the Portuguese who had died of hunger while under siege from the natives. After this "greeting", the Molimo allows the other two men to enter as well. Meyer spots a well in the middle of the cave and decides to descend into it in search of the gold.
  12. The Beginning of the Search: Toxic gases prevent Meyer from investigating too deeply into the well. Later, the searchers discover an underground chamber, but it also contains no gold, only a dead monk. When Meyer begins cursing the dead, the Molimo prophecies that Meyer will suffer for his indiscretions.
  13. Benita Plans Escape: In the following days, Meyer begins to show a more possessive interest in Benita, and even intimates that he can read her mind through some kind of mental link. Alarmed, Benita hatches a plan to escape with her father, leaving Meyer behind at Bambatse.
  14. The Flight: The next day, Benita and Clifford prepare horses and provisions and secretly depart Bambatse. However, in a couple days they run into Matabele scouts.
  15. The Chase: When Clifford and Benita are spotted by one of the scouts, Clifford kills him with his rifle. When Matabele warriors begin chasing them, Clifford and Benita race back towards Mambatse. Just as Clifford and Benita are about to be overtaken by Matabele warriors, Meyer appears with rifle-bearing Makalanga and fights them off. Meyer claims that he had received a mental signal from Benita calling him to their aid.
  16. Back at Bambatse: When Benita recovers from her ordeal, the Molimo tells her that he had sent spies to look for them, as he knew they would return. After he departs to the outer fortress walls, Meyer appears and tells Benita and Clifford that he has just sealed off the entrance to the central portion of the fortress containing their cave so that no one can come in or leave. Meanwhile, the Matabele surround Bambatse.
  17. The First Experiment: Meyer claims that Benita must be the key to the treasure, as prophesied by the Malalanga's beliefs . He proposes to mesmerize Benita in order to probe her mind for buried secrets. Fearful that Meyer might enslave her through mesmerism, Benita only allows him to instruct Clifford in the art. During the instruction Meyer hints that he had already put a spell of some sort on Clifford in order to preserve his loyalty. Clifford ultimately fails to mesmerize Benita, although when Meyer tries to intervene he almost puts Benita into a dangerous trance.
  18. The Other Benita: In the following days, the Matabele try to attack Bambatse, but the Malalanga repulse them with guns, at least temporarily. Growing desperate, Meyer mesmerizes Benita while she is asleep and draws forth a consciousness which recalls memories starting from 33,000 years in the past. Eventually, her mind is possessed by the Portuguese woman, Benita da Ferreira, and this alternate Benita states that she has passed on the location of the gold to the modern day Benita.
  19. The Awaking: Clifford forces Meyer to release his hold on Benita, after which she returns to bed. The next morning, Clifford tells his daughter what Meyer had done the previous night, infuriating Benita. When Meyer asks to mesmerize her once again, Benita flatly refuses, as she already feels that Meyer has established some kind of uncanny influence over her will.
  20. Jacob Meyer Sees A Spirit: One day, Benita climbs to the top of the central cave cone, and from this height seems to see a white man amongst the surrounding Matabele hoard. However, he soon disappears. Then, while Benita is fetching water from the cave's well, Meyer tries to exert his mental control over her. However, just as Meyer puts his lips on Benita's his spell is broken and she pushes him away. Later, a terrified Meyer emerges from the cave claiming to have seen a female ghost kneeling at the statue of a crucified Christ. He runs off on a panic.
  21. The Message From the Dead: In order to prevent Meyer from returning and killing Clifford, Benita and her father make a new camp inside the cave in which Meyer had seen the ghost. They also barricade the entrance. While Meyer waits for them to come out for food, inside Clifford begins to fall ill. While praying at the foot of the carved crucifix statue, Benita receives a message from the spirit Benita, revealing to her a secret passage below the crucifix which leads to the gold. 
  22. The Voice of the Living: After Clifford convinces her to leave him in order to seek out help, Benita goes down the secret stairs under the statue and finds the Portuguese gold. Nearby, she finds another set of stairs which takes her out of the complex to emerge in the swamp just outside Bambatse's outer wall. Benita decides to seek out the white man she had seen earlier amongst the Matabele. This turns out to be Seymour.
  23. Benita Gives Her Answer: Benita learns that Seymour had been captured by the Matabele as he was approaching Bambatse in search of Benita. The Matabele then approach Seymour's wagon and tell him that their king has ordered them to abandon the siege on Bambatse. However, they plan to execute Seymour first for deceiving them earlier. Benita realizes that they are being addressed by Maduna, who still owes her a life debt. She uses this to save Seymour's life and obtain some oxen from the Matabele.
  24. The True Gold: After returning to the cave through the secret passage, Seymour and Benita discover that Clifford is still alive. They then break down the barricade and enter the central section of the fortress which Meyer had earlier sealed off from the main sections. When Meyer detects their arrival he tries to shoot Seymour. Fortunately, he misses and is eventually brought down by a tackle. When Meyer sees the gold treasure, he claims to see a ghost and then drops dead, apparently of a seizure of some sort. Benita notes that here are mysterious footsteps in the sand leading to Meyer's body. As they depart Bambatse, the Molimo tells Benita that the Spirit of Bambatse had helped her through her recent struggles, but has now gone to the heavens.

Wikipedia Entry
Illustrations at Visual Haggard
https://www.southafricabooks.com/h-rider-haggard/1885-king-solomons-mines
https://swordsofreh.proboards.com/thread/502/rider-haggard-influence-classic-author

Jules Verne's "Twenty Thousand Leagues Under the Sea" (1870)

Published in monthly serial installments from March 1869 to June 1870 in the French juvenile magazine "Magasin d'éducation et de récréation" ("Magazine of Education and Recreation"), Verne’s underwater adventure was first published in book form as two separate volumes and then released in a single deluxe volume which included 111 illustrations by Alphonse de Neuville and Édouard Riou. English translations of the original French text have often been edited and badly translated, but the below chapter synopses are based on the 1999 complete translation by Frederick Paul Walter (found on Project Gutenberg). The original illustrations below are from the 1875 Osgood & Co. deluxe edition (which uses the same illustrations as the French deluxe edition and can be found on Archive.org).

In Brief: When a mysterious sea monster causes accidents on the high seas, a French professor named Aronnax joins an American expedition to seek it out. Aronnax, his manservant Conseil and the Canadian harpoonist Ned Land inadvertently find themselves prisoners onboard an advanced metal submersible (the Nautilus, a submarine) and taken on a tour of the deep seas. On the way, the mysterious Captain Nemo engages in some secret activities which troubles Aronnax’s conscience. The Nautilus and its guests encounter various dangers (cannibals, giant squids, avalanches in the South Pole). Back in the north, the Nautilus comes under fire by a frigate. After the Nautilus destroys it and it’s hapless crew, Aronnax and his friends hatch a plan to escape the obsessed and dangerous Captain Nemo. When the Nautilus is caught in a giant whirlpool, Aronnax and his friends escape in the Nautilus’ detachable skiff.

Synopsis

FIRST PART

CHAPTER 1: A Runaway Reef
In 1866, several ships encounter (and run afoul of) a mobile, glowing underwater object, initially thought to be an uncharted reef, but later characterized as a sea monster. The following year, a cruise ship of the famous Cunard line (the Scotia) is damaged by an underwater attack, leaving an unnaturally clean hole in its hull. The public begins demanding that the monster be destroyed.

CHAPTER 2: The Pros and Cons
An Assistant Professor at the Paris Museum of Natural History named Aronnax theorizes that the sea monster could only be a giant narwhale, since no country would be able to create a man-made vehicle with such advanced abilities without being noticed. An American frigate named the Abraham Lincoln is assigned to hunt down the creature, and Aronnax is invited to join the expedition as France’s representative.

CHAPTER 3: As Master Wishes
Aronnax has his manservant Conseil prepare their belongings and board the Abraham Lincoln. The ship departs New York harbor with great fanfare.

CHAPTER 4: Ned Land
During the voyage, Prof. Aronnax becomes friends with the great Canadian harpooner Ned Land. Ned Land is skeptical of Aronnax’s narwhale theory, but he has no other explanation for the phenomenon.

CHAPTER 5: At Random!
Months pass and spirits fall as the expedition seems to have no real trail to follow. With the crew near mutiny, Farragut decides to allow the Abraham Lincoln to head back towards home empty-handed, but at the last moment Ned sights the creature.

CHAPTER 6: At Full Steam
The Abraham Lincoln pursues the creature but is hopelessly outmatched by its speed. For the next day the creature toys with the frigate. The next night the creature’s glowing core shows that it has ceased moving and the Lincoln moves in for a strike. Ned’s harpoon bounces off the creature's skin. Waterspouts then erupt from the creature which hit the frigate and knock Aronnax overboard.

CHAPTER 7: A Whale of Unknown Species
Conseil dives after his master into the sea, while the Abraham Lincoln sails away, its propeller and rudder damaged by the creature. Aronnax and Conseil eventually come across Ned Land who is standing atop the creature, which turns out to be some kind of metal submersible ship. Hours pass and Aronnax thinks he hears music coming from inside. Eventually the submersible seems to take notice of its topside passengers and the trio are brought below.

CHAPTER 8: “Mobilis in Mobili”
The three are placed in a dark room. Eventually two figures appear, one of them strangely noble, but neither say a word to the inadvertent guests. Eventually they are served food with silverware engraved with the logo "MOBILIS IN MOBILI - N" (“moving within the moving element”). Still puzzled as to the identity of their captors, they fall asleep.

CHAPTER 9: The Tantrums of Ned Land
The next day no food arrives and Ned begins thinking of trying to take over the ship by force. Eventually a steward enters. Ned attacks him, but a voice calls out in French.

CHAPTER 10: The Man of the Waters
The owner of the voice, Captain Nemo, tells the trio that they may stay onboard his vessel but must agree to confinement during certain unavoidable actions he must take in the near future – this will spare them from becoming “complicit witnesses”. However, they are not allowed to leave the ship. Ned Land is at first angry at this condition, but is appeased when he and Conseil are led to some food. Nemo hosts Aronnax himself as a dinner guest and explains that all of their food, clothing and utensils come from the sea.
“Let me tell you, professor, you won’t regret the time you spend aboard my vessel. You’re going to voyage through a land of wonders. Stunned amazement will probably be your habitual state of mind. It will be a long while before you tire of the sights constantly before your eyes. I’m going to make another underwater tour of the world—perhaps my last, who knows?—and I’ll review everything I’ve studied in the depths of these seas that I’ve crossed so often, and you can be my fellow student. Starting this very day, you’ll enter a new element, you’ll see what no human being has ever seen before—since my men and I no longer count—and thanks to me, you’re going to learn the ultimate secrets of our planet.”
CHAPTER 11: The Nautilus
Nemo gives Aronnax a tour of his private museum and library. They enjoy some “undersea cigars”.

CHAPTER 12: Everything through Electricity
Nemo gives Aronnax a tour of the engine room and explains that he has found a way to generate electricity from sea water.

CHAPTER 13: Some Figures
Nemo explains how the ship functions underwater, and that the component parts for the construction of the Nautilus were built by different companies from different countries and then assembled at a secret island. He claims that he is wealthy beyond belief.

CHAPTER 14: The Black Current
As the Nautilus navigates through the Black Current off Japan, Aronnax, Conseil and Ned marvel at the aquatic marvels they see through an underwater viewing port.

CHAPTER 15: An Invitation in Writing
Nemo disappears for several days, but eventually invites Aronnax and his friends to join him on a hunt in an underwater forest (Crespo). He explains how his diving suits work.

CHAPTER 16: Strolling the Plains
Aronnax and Conseil don the underwater breathing suits and accompany Nemo on an underwater walk to the sunken Forest of Crespo.

CHAPTER 17: An Underwater Forest
On the way to the Forest of Crespo they encounter a giant spider but it is easily repelled with a gun butt blow. After using air guns to shoot a sea otter and an albatross (as game), they head back. When a shark appears they quickly drop out of sight to avoid its attentions.

CHAPTER 18: Four Thousand Leagues Under the Pacific
The Nautilus continues its deep sea journey and Nemo expounds on the elegance of life in the ocean. One day they encounter a sinking ship and witness drowned men and women still lashed to the ship's structure. The Nautilus goes around and continues on its way.

CHAPTER 19: Vanikoro
Off the coast of the island of Vanikoro, Nemo describes the fate of the missing French explorer La Pérouse, whose wreckage he had discovered years earlier.

CHAPTER 20: The Torres Strait
While navigating through the dangerous Torres Strait, the Nautilus runs aground on a coral reef. Nemo decides to wait for a full moon so that the rising tide can float the Nautilus free. In the meantime, Ned, Conseil and Aronnax decide to do some (land) hunting on nearby Gueboroa Island (Papa New Guinea).

CHAPTER 21: Some Days Ashore
In the next few days the explorers collect fruits, vegetables and hunt down some game. Ned considers abandoning the Nautilus, but a thrown rock suddenly lands in their midst.

CHAPTER 22: The Lightning Bolts of Captain Nemo
Attacked by native cannibals, the trio quickly return to the Nautilus but Nemo seems unconcerned with the savages. When the moon arrives to allow the Nautilus to break free, the savages attack the ship, but an electric charge applied to the hull drives them away. The Nautilus escapes the Torres Strait.

CHAPTER 23: “Aegri Somnia” (“troubled dreams”)
One day Nemo’s mood becomes dark after his chief officer reports a sighting of some kind. Before Aronnax can determine what is happening, Nemo has his three guests confined to a windowless room. They soon find out that their lunch has been laced with a sedative and fall unconscious into unhappy dreams.

CHAPTER 24: The Coral Realm
The next day Nemo asks Aronnax to inspect a wounded member of his crew. Aronnax can do nothing and the man dies in the night. The next day Nemo invites his guests on an underwater excursion among the coral reef. Nemo and his men lay down the corpse of the dead man in an underwater cemetery.

SECOND PART

CHAPTER 1: The Indian Ocean
The Nautilus heads north towards India and passes through a "milky" part of the sea colored by a field of white glowworms.

CHAPTER 2: A New Proposition from Captain Nemo
Nemo invites Aronnax to accompany him on an inspection of some local pearl fisheries off Ceylon (Sri Lanka). However, Aronnax panics when informed about the nearby sharks. Conseil and Ned Land are also invited but seem oblivious to the danger.

CHAPTER 3: A Pearl Worth Ten Million
Nemo leads his guests to an underwater cavern where he is growing a massive pearl for the future. On the way back they a pearl diver attacked by a shark. Nemo attacks the shark in order to save the Indian diver. When Nemo begins losing the battle, Ned Land steps in and delivers the death blow. Nemo revives the diver and gives him some pearls before returning to the Nautilus. On board, Nemo tells Aronnax that he will always fight for the oppressed.

CHAPTER 4: The Red Sea
The Nautilus enters the Red Sea. Nemo informs Aronnax that they will soon reach the Mediterranean by navigating through an unknown tunnel connecting the two bodies of water.

CHAPTER 5: Arabian Tunnel
On a hunting trip, Ned Land harpoons a gigantic dugong (manatee). The Nautilus navigates through Nemo’s Arabian tunnel into the Mediterranean.

CHAPTER 6: The Greek Islands
Ned extracts a promise from Aronnax that they will try to escape if a real chance presents itself. Near the Greek islands, Nemo has gold delivered to a local diver he is friends with. The next day Nemo takes the Nautilus near an underwater volcanic region in order to impress Aronnax with the tectonic “construction” under the sea.

CHAPTER 7: The Mediterranean in Forty-Eight Hours
The Nautilus continues towards the Straits of Gibraltar. On the way, Aronnax makes note of the exotic undersea life as well as the many shipwrecks residing at the bottom of the sea.

CHAPTER 8: The Bay of Vigo
While passing near Spain, Ned insists that they make an escape attempt that night. Aronnax is unhappy about this move, but feels obligated to keep his promise. Just as the agreed time arrives, Aronnax runs into Nemo who tells Aronnax that they are currently at the bottom of the Bay of Vigo, where he gathers lost gold from the ships sunken there. Nemo claims that he has been using these lost treasures to finance the objectives of the oppressed, for example the Greeks’ fight against the invading Ottoman Turks.

CHAPTER 9: A Lost Continent
The next day Ned expresses his frustration that the previous night’s stop at the gold-laden ship graveyard had spoiled his plans for escape. That night, Nemo invites Aronnax for an underwater expedition. They visit the lost city of Atlantis, now in ruins.

CHAPTER 10: The Underwater Coalfields
After passing over the sunken continent of Atlantis, the Nautilus navigates through an underground tunnel which leads to the interior of a hollowed-out volcano. Here at his hidden base, Nemo replenishes his fuel supplies. Aronnax and his friends scout the interior and collect some honey.

CHAPTER 11: The Sargasso Sea
Nemo has the Nautilus pass through the Sargasso Sea, a “lake in the ocean” created by the Gulf Stream. The whirlpool nature of the water causes masses of vegetation and debris to collect in this region. After passing below the weeds, Nemo takes an detour into the deep depths of the area, where Aronnax takes some photos.

CHAPTER 12: Sperm Whales and Baleen Whales
When the Nautilus encounters a herd of baleen whales, Ned feels frustrated that he cannot use his harpoon skills on them. A herd of aggressive sperm whales approach and Nemo decides to fight off the sperm whales using the metal spur of the Nautilus to cut them in half. Afterwards, Ned becomes more and more resentful of Nemo.

CHAPTER 13: The Ice Bank
Nemo heads further south into the Antarctic towards lands unexplored (even by him). Eventually they are confronted by the Ice Bank, a frozen landmass surrounding the South Pole. The Nautilus dives to less icy waters below the gigantic ice continent, and eventually reaches open sea once again after a couple days' journey underground.

CHAPTER 14: The South Pole
The ship arrives at another landmass and Aronnax studies the local wildlife (seals, walruses, birds). Nemo tries to take a reading to determine if they have actually reached the South Pole. After a couple days’ worth of bad weather, the reading is successful and confirms that Nemo is the first man to reach the South Pole. Nemo then plants a flag with the letter “N” on it and claims the Antarctic continent as his own sovereign territory.

CHAPTER 15: Accident or Incident?
The Nautilus heads back north but during the passage below the Ice Bank an iceberg shifts, causing the Nautilus to become shunted into a tunnel. They soon find that the tunnel has no exits.

CHAPTER 16: Shortage of Air
Faced with dwindling air supplies, the crew work feverishly to manually chip away a passage through the ice wall. At the same time the walls of the tunnel begin to freeze and close in, threatening to crush the Nautilus. Nemo ejects boiling water to halt the freezing process. With their air supply almost gone, Nemo has the Nautilus break through the final layer of ice entrapping them in the chamber. As they continue further north under the Ice Bank he realizes that they will not have enough air to reach open sea. He has the Nautilus aimed upwards and breaks through the floor of the Ice Bank by ramming it.

CHAPTER 17: From Cape Horn to the Amazon
Recovered with fresh air supplies, the Nautilus heads north along South America and nears the mouth of the Amazon. There the crew catches lamprey fish, and use these sucker fish to in turn capture giant turtles.

CHAPTER 18: The Devilfish
Heading further north into the Atlantic, the Nautilus encounters some giant squid. When several of these begin latching onto the ship, the propeller becomes fouled. Nemo has his vessel surface, after which a tentacle tears off the top hatch and invades the ship. A French sailor is taken by the tentacle and killed. On deck, the crew battle a dozen of the giant squid. Ned Land is caught by one of the giant tentacles and almost cut in half by the squid’s beak – however Nemo saves his life, paying back his debt to Ned from the pearl incident. Nemo mourns the loss of his crewman.

CHAPTER 19: The Gulf Stream
Nemo seems to withdraw into himself. As the Nautilus approaches Ned's hometown in Nova Scotia, he is determined to confront Nemo about regaining his freedom. When Aronnax sees Nemo, the captain is completely unsympathetic to his request. As the vessel passes by the Canadian coast, a lightning storm rises, foiling Ned’s plan of stealing the Nautilus’ skiff to escape. Nemo endures the storm on deck alone.

CHAPTER 20: In Latitude 47° 24’ and Longitude 17° 28’
The Nautilus heads further north, and then south, as if searching for something. They pass the the Transatlantic telegraph cable. Eventually Nemo finds what he has been looking for, the sunken wreckage of the French warship The Avenger.

CHAPTER 21: A Mass Execution
On the surface, a warship of unknown nationality begins shelling the Nautilus. Ned urges his friends to attempt swimming to the warship, but the Nautilus submerges before they can reach the deck and jump overboard. Aronnax is horrified as the Nautilus uses its ramming spur to sink the warship, consigning its crew to death. After following the boat's sinking wreck down to the bottom, Nemo retreats to his chambers and sobs before a picture of his wife and children.

CHAPTER 22: The Last Words of Captain Nemo
In the following days, ominous silence reigns over the ship, and Aronnax hardly sees any sign of the crew, let alone Nemo. One day Ned sights land through the mists and sets a time to escape. When Aronnax heads to the escape boat, he sees Nemo playing the organ. Just as he leaves the lounge he hears Nemo exclaim, “O almighty God! Enough! Enough!” At the skiff, Ned tries to release the boat but then realizes that the vessel is caught in the Moskstraumen, a notorious maelstrom. With possibility of escape banished, Ned tries to re-secure the boat but it is torn loose by the whirlpool and Aronnax loses consciousness.

CHAPTER 23: Conclusion
Aronnax wakes up in a hut on one of the Lofoten Islands with Conseil and Ned by his side. As he goes over his notes, he wonders if the Nautilus has survived the Maelstrom and if so, hopes that Nemo will one day turn away from his destructive mission of vengeance.